Compared with garages, carports are more affordable to build. This might be your cheapest solution to protect your cars from the weather and any external element that can ruin them. However, a standard carport is not enough to combat extreme weather conditions, like a sand storm, strong wind, or blizzard.
Garages, on the other hand, with a more protected structure, delivers everything that carports lack. Garages provide more security for your cars and other precious belongings.
- What Are the Benefits of Enclosing a Metal Carport with Wood?
- Why You Should Enclose Your Metal Carport with Wood?
- Where is the Best Area to Build an Enclosed Metal Carport with Wood?
- Is Enclosing a Metal Carport with Wood a DIY Project?
- What Are the Things You Need to Build an Enclosed Metal Carport with Wood?
- How Do You Build an Enclosed Metal Carport with Wood?
- What Are the Mistakes You Should Avoid When Enclosing a Metal Carport with Wood?
- Enclosing a Metal Exterior Carport with Wood Siding and a Double Sliding Barn Door
- Enclosing a Tin Metal Roof Carport with Wood Siding and No Doors
- Enclosing a Metal Carport with a Horizontal Wood Slat Wall
So, what is the solution if you can’t afford to build a garage right now but still want to get their advantages?
The answer is building an enclosed carport. Enclosing your carport will also secure your car perfectly, making it a better choice than a standard carport.
When it comes to the materials, it’s safe to say that metal carports are the best. Metal carports can be great for storing your precious stuff. You can even use metal carports as a workshop, animal shelters, or barns.
Metal carports are good. But why don’t you level up the game? It is even better to enclose your metal carport with wood!
1. What Are the Benefits of Enclosing a Metal Carport with Wood?
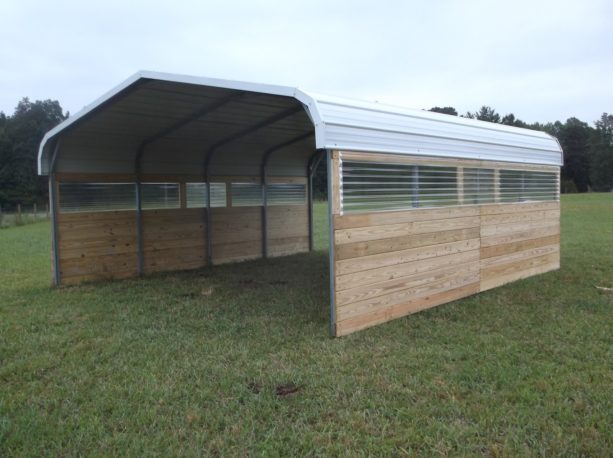
If you are still not sure about enclosing your carport, here are some considerations that might sweep away your doubts:
- An enclosed metal carport will give you excellent protection against vandals, thieves, and other unwanted things.
- Your valuable things, as well as expensive vehicles, will stay right in their place, in a secure enclosed place.
- You can save your money. Instead of building a metal garage, enclosing a metal carport is way cheaper.
- Plus, enclosing a metal carport also takes less time than building a new garage.
- Your enclosed carport can be versatile. It can be used in many ways, not only for storing your vehicles but also for workshops or offices.
- A metal carport can be easily modified, thanks to the basic metal framework.
- If you like, your metal carport can be transformed into a barn too. It will be an excellent shelter for animals. Plus, in your enclosed metal carport, you can also store crops, hay, and other farming equipment.
2. Why You Should Enclose Your Metal Carport with Wood?
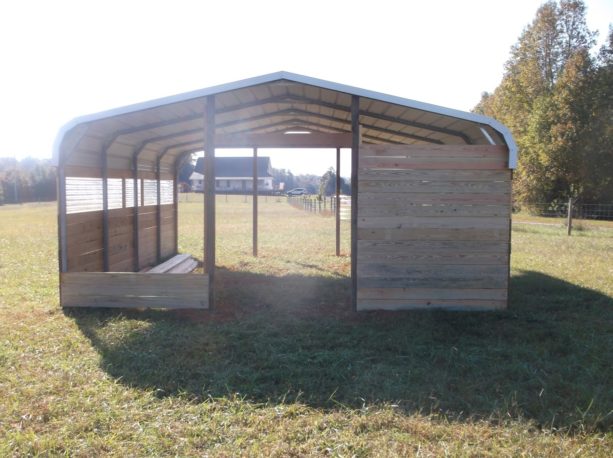
It is true that for some reason, people would prefer to have a full metal carport instead of wood. However, combining these two elements will give you two benefits instead of one.
For instance, a metal carport is known to be cheaper than a wood one, but it is less beautiful. If you want to create a beautiful yet affordable carport, combining metal and wood can be your best solution.
Here are some reasons why you should enclose your metal carport with wood:
- Good appearance. An enclosed carport indeed looks more admirable than an open carport, especially if you enclose it with painted wood. The color can be chosen based on your personal preference or your home exterior’s style. Moreover, the closed frame gives a harmonious appearance with your home architecture. Therefore, it can add value to your house.
- Increasing security. A wood carport, especially the open one, can’t protect your valuable things perfectly. To top it off, wood is a combustible element, which can be dangerous once there’s a fire. On the other hand, metal gives a stronger and sturdier structure. It is non-combustible too. When you build a structured frame carport with an enclosed wood, you’ll have a shelter that protects everything inside from blowing snow, storm, and strong wind.
- Giving additional space. If installed properly, an enclosed metal carport can be a nice additional space for your property. It can be an extension of your indoor living space. An enclosed metal carport can be a kid’s play area too. You can decorate and paint the wood to add some fun elements to it.
- Cost-effective. As stated before, constructing a wood carport or a whole wood garage will cost you a fortune. Considering the frames, windows, material, and such, it’s better to go for an enclosed metal carport with wood siding.
3. Where is the Best Area to Build an Enclosed Metal Carport with Wood?
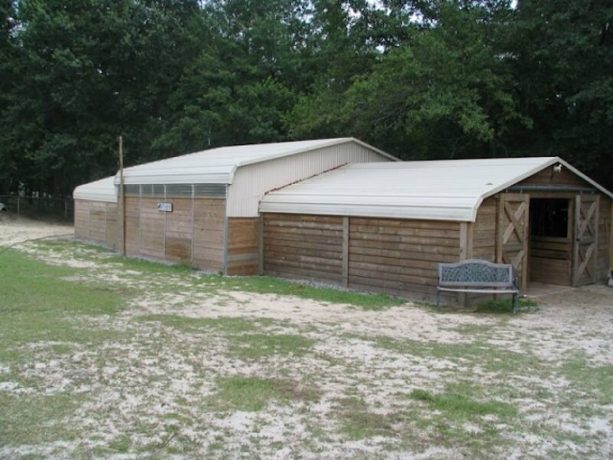
Commonly, a carport is attached to the garage. Or, if you don’t have a garage, the carport is usually installed right in front of the house or in the side area. However, there are two choices you should consider, attached or detached?
Attached carports, as implied by the name, are carports that are part of the main house. Usually, there is a breezeway or an opening to connect the carport and the house.
Attached carports are the most common option for many homes. They come in many shapes and sizes. These are the pros and cons of having an attached carport:
- Attached carport is convenient to use.
- It is also less expensive to build because it is basically an extension of the main property.
- You can use heating and electrical systems that are part of your house to this attached carport.
- It can add property values.
Yes, the attached carport gives your pets, kids, and even you access it right from the house. However, there are some downsides too:
- It is hard to fit an attached carport to a narrow lot.
- It will be riskier to attach your carport to your main house because if your house is in danger, your valuable things inside the carport are in danger too.
- It has a greater fire risk too.
- An attached carport is challenging to expand if one day you want to modify it.
- It also affects the exterior appearance of your home. If it’s good, then it is good. But if it’s terrible, the whole exterior can look awful too.
- When constructed, an attached carport may need a more expensive building permit.
So, what about a detached carport?
Detached carports, on the other hand, are not part of the main house. They can be close by or even on the other side of the house. Usually, detached carports are larger and more creatively built, thanks to the freedom of a standalone structure. Yet, here are some pros and cons of a detached carport.
- You have the freedom to maximize the lot area.
- There’s more room for cars. If you have visitors coming with their own cars, they can store their vehicles in your carport too.
- It is easier to expand or modify a detached carport.
- Since it is separated from the main house, it is considered more secure too. If something happens in the main property, your valuable things remain safe in their own place.
- A detached carport can also improve curb appeal.
- Overall, many people believe that a detached carport can increase resale value.
Generally, detached carports are more spacious than the attached ones. If you have hobbies like welding, car repair, or construction, a detached carport can give you more room away from the main property.
A detached carport can be installed on the sides of the house or in the corner. However, detached carports do have downsides too:
- It takes extra effort to access this area from the house. And this can be a problem during bad weather.
- It needs a separate source for utilities. You have to prepare your own electrical system.
- It can take up a lot of yard space.
- In some cases, a homeowners association may disallow a detached carport.
4. Is Enclosing a Metal Carport with Wood a DIY Project?
Even though you need to consult with an architect first, an enclosed metal carport with wood can be installed on your own. The tools and things you require can be purchased in any home supplies store.
5. What Are the Things You Need to Build an Enclosed Metal Carport with Wood?
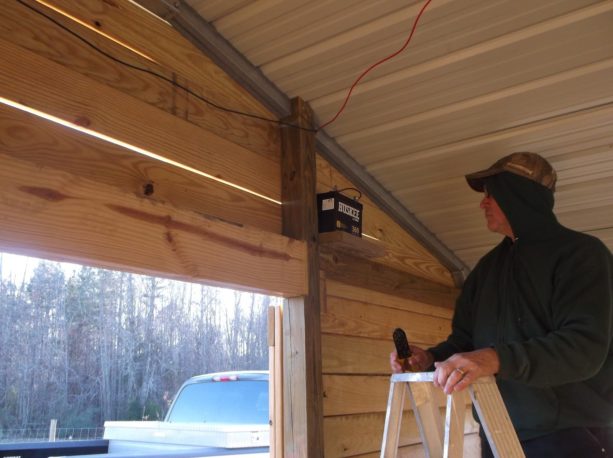
Here are some tools you need:
- Scrub brush: This is useful to prepare the area well. Scrubbing brush has hard bristles to clean up the floor from the dirt; it is more valuable than brooms. Keep it dry for dry cleaning the floor or soak the brush in the water for wet cleaning.
- Measurement tape: You need this tape for measuring the carport and making a box in the same size as the rebars and boards. Make sure the tape has an easy-to-read marking to identify the accurate measurements quickly.
- Nails: There are different materials when it comes to nails: aluminum, copper, brass, steel, and many more. Pick the ones with a length 2 1/2 bigger than the thickness of the wood you are nailing through.
- Screwdriver: This is used for making a series of wooden frames. Pick a set of screwdrivers consisting of different designs and models for pushing and turning.
- Circular saw: The best circular saw is the one that can make quick and straight cuts across wooden boards nicely.
- Gloves: Gloves are needed to prevent injuries in your hand. There are many types of hand gloves on the market: cut-resistant, mechanical, electrical, thermal, etc.
- Safety glass: This is the same with gloves. Safety glasses can help you avoid injuries and unwanted incidents. Before purchasing, consider the lens materials, comfort level, and optical clarity.
Here are the materials you should purchase too:
- Wooden boards: You can buy some different types of 2×4 boars, like hickory, walnut, or maple). Boards are needed for some frames in the wall.
- Cement: Pick a strong dry-base cement that can hold its shape well while drying. Make sure you give 24 hours for the cement to dry properly before moving on to the next step.
- Rebar: This is a short form of reinforcing bar. It is helpful to make a solid frame for the structure. There are different kinds of rebars, like stainless steel rebar, epoxy coated rebar, basalt rebar, tempered steel rebar, etc.
- Plywood: Marine-grade plywood is needed to cover the exterior wall of your carport as the finishing touch. Ideally, the plywood should be 3/4” thick with no defect and an open hole. Individual plywood boards in 2×4’ can also be used for this purpose.
- Primer: Primer the interior of your enclosed carport before adding the electrical fixture. Primer is needed for any kind of painting job. This way, you don’t need an extra coat of paint.
- Paint: After applying the primer, you can start painting the interior. There are several paints on the market; make sure you choose the ones that can go well with the wooden surface.
- Drywall: This is one of the most fundamental parts of an enclosed metal carport. The drywall’s thickness may range from 1/4” to 5/8”. Standard drywall is the most common option, but you can up the ante by choosing fire-resistant drywall, moisture-resistant, or mold-resistant.
6. How Do You Build an Enclosed Metal Carport with Wood?
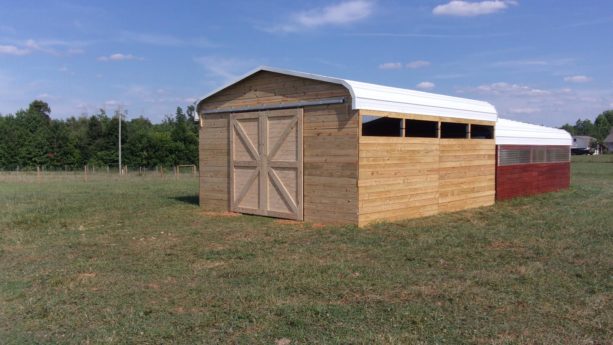
Basically, enclosing a metal carport is an easy task. With just a little help, you can do it on your own. Here are the steps you need to follow:
Step 1: Checking the Current Structure
- Evaluate your carport right now and check if it needs any kind of repair.
- Make sure that is no damaged roof or broken tiles.
- If nothing’s broken, you are ready to start transforming this whole area!
Step 2: Preparing Your Carport:
- Cleaning your carport floor properly with a scrub brush.
- Build a carport-sized frame with boards and rebars if your carport doesn’t have a solid base.
- Pour the concrete mixture into a box and let it naturally dry to make a concrete base.
- Seal the concrete with epoxy resin (optional).
Step 3: Cutting the Frames:
- Determine the size of your carport first. Use the standard 2×4 boards you’ve bought before.
- Place the 2×5 boards on the ground and attach the verticals. Then, attach another one of these boards on top of it.
- Create the same structure for the long walls.
- Test how this structure holds against the water.
- It is required to make the best solution for draining water during rainy days.
Step 4: Installing the Frames
Using bolts, connect the concrete base with a wooden frame. Attach the walls to the roof using long nails and a screwdriver.
Step 5: Covering the Walls
- As a final step, install an exterior wall. There are many types of siding; you can choose one based on your preference. Ideally, marine-grade plywood is the best option for this.
- Attached are the required windows and doors to the openings.
Step 6: Installing the Insulation and Electrical Wire
- For this step, you need to hire an electrician to properly install the electrical wires.
- Adding insulation is a good idea too, because it can reduce your cooling cost up to 25%.
Step 7: Adding Finishing Touch and Choosing Your Preference
- Install the drywall in your carport.
- Choose any type of flooring you like (wood, carpet, tiles, etc.).
- Prime your carport’s surface.
- Pick your preferred color and paint it across the carport.
- Last, install the light fixtures and add the needed furniture.
7. What Are the Mistakes You Should Avoid When Enclosing a Metal Carport with Wood?
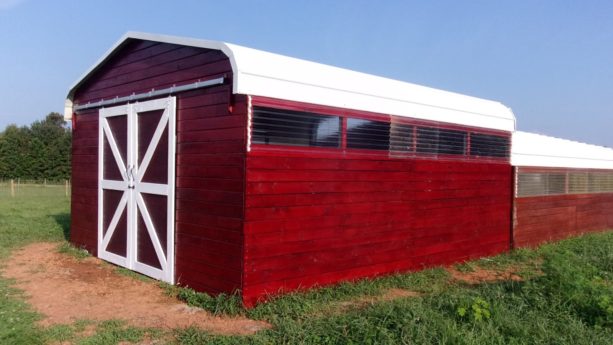
Be careful! Even though enclosing a carport is easy, there are some basic things you should never forget. These things are often overlooked, but they can ruin the whole project if not taken care of. Here are the things you should avoid when enclosing your carport:
- Not cleaning up the floor before starting the project. This is the common mistake many of us often make when enclosing carports. A dirty floor can create many problems during this project.
- No solid foundation. First of all, you have to build a solid concrete base for the carport. This is the foundation of the whole structure. Make sure everything is perfectly level. If you don’t put a concrete base, the walls will get damaged after some time. If your carport has already had a concrete base, check whether it is thick enough to hold the new frames or not.
- Don’t use exterior grade plywood on the outside. This kind of plywood is needed because it doesn’t get damaged by weather conditions and moisture. It doesn’t warp either. If you only install interior-grade plywood, it only lasts until it rains. Marine-grade or exterior-grade plywood, on the other hand, can provide extra strength to the wall cover. Therefore, it can improve the structure’s durability.
- Don’t add an electrical outlet before adding the drywall. Even though this is not essential, many of us still would love to have electrical outlets in our carports. It is good, but make sure that the wiring should be done before adding the drywall. This way, the wires will blend seamlessly with the drywall. They can deliver a professional look to your carport.
- Lack of planning. This is another common mistake we usually make when enclosing a metal carport. It is essential to have a good plan and strategy for this project. The plans can help you cover everything. Never guess your way through everything during this project. It needs a lot of preparation as well as accurate measurements to make sure everything is done properly.
8. Enclosing a Metal Exterior Carport with Wood Siding and a Double Sliding Barn Door
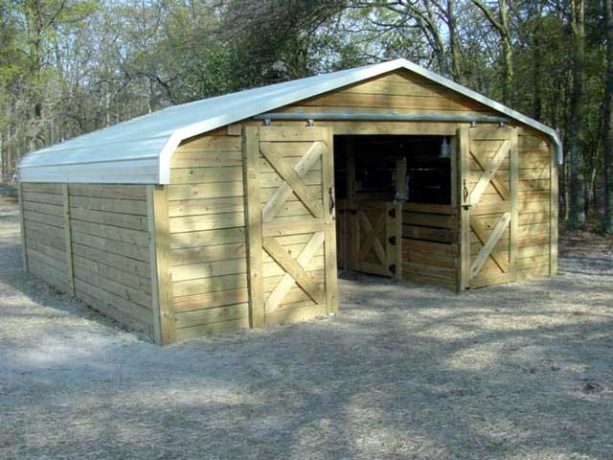
This carport has a strong and solid metal roof. It is clear to see that this carport is used as a stable for the horses.
As stated before, there are many ways to utilize a metal carport. This used to be an 18’ x 20’ rounded eave carport completed with 5’ legs. Later, the homeowners enclosed the walls with treated lumber 5/4” x 6”.
The top of each board was caulked before attaching the next. That way, there would be a watertight finish keeping both supplies and animals safe from external elements.
This durable carport also features a double sliding barn door that blends seamlessly with the wood siding.
Sliding doors like this can create a seamless flow between outdoor and indoor spaces. They are also easy to install and have great functionality. Commonly, double sliding barn doors are also made of lightweight materials, so they are easy to open even with your hands full.
9. Enclosing a Tin Metal Roof Carport with Wood Siding and No Doors
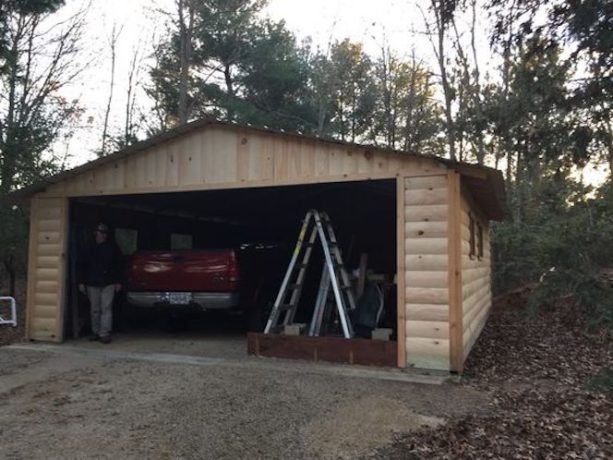
We can see that this huge enclosed carport can accommodate two cars at a time. However, this carport is also used as storage, which is placed side by side with the vehicle. It seems that the carport has a tin roof that looks less sturdy compared with the wood siding. It seems like the wood here is only coated with transparent stain, so the natural looks are still there.
The great thing about this carport is, it has no doors whatsoever. So, this enclosed carport is not fully enclosed with four walls. There are only three walls enclosing this area, and the opening remains open. Thus, that’s what differentiates this carport from a garage. The homeowners can easily move in and out of the cars without having to open or close the doors.
10. Enclosing a Metal Carport with a Horizontal Wood Slat Wall
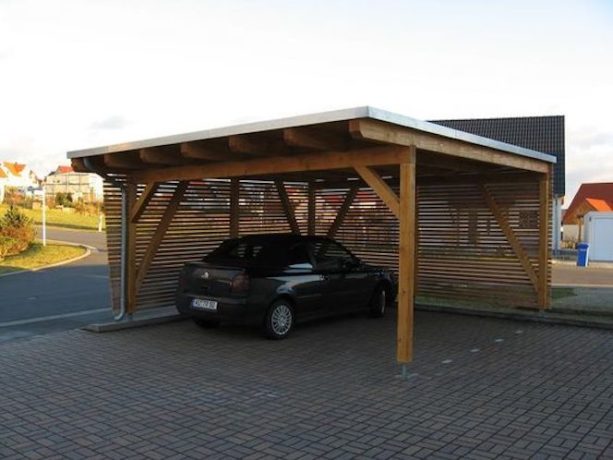
This metal carport is not fully enclosed like a garage. There are only two enclosed horizontal wood slat walls. The slatted walls are in tight space, so they can give better protection for the vehicles but at the same time enable the homeowners to look through the walls. This way, the slatted walls can also be used as a screen too.
The structure of this carport is relatively easy to be made in a DIY project. It is a post and beam structure that you usually see in an industrial or rustic style. The beams are later covered with metal roofing to protect the cars perfectly.
This carport is also completed with a gutter drain that is useful to collect rainwater from the flat metal roof.
The two openings in this metal carport ease the homeowners from accessing this carport. Basically, this is not a large area. This carport can only accommodate two cars at the same time, parked side by side. And this carport is only meant as a carport only, not as a workshop or as storage, due to the lack of enclosing materials.
Closing
So, what is your opinion about enclosing your metal carport with wood? Which one do you think is better, enclosing the carport with wood siding or horizontal slat woods? Despite the models, designs, and materials you choose, it is important to always consult with a designer or an architect beforehand. Good luck with your project!


Leave a Reply
View Comments